Today, I was looking to rebrand the KDE desktop with my own flair. I read this very good tutorial at techbase.kde.org. However, there were a few subtleties that I found it lacking with regard to editing the brand.svg file, as well as any other icon in a theme’s library.
A little background:
Theme data can be found in one of two key directories:
- /usr/share/kde4/apps/desktoptheme/
- ~/.kde/share/apps/desktoptheme/
There are a couple other files that can be found here and there (for example, Ubuntu declares their own default branding for the Air theme in /usr/share/kubuntu-default-settings/kde4-profile/default/share/apps/desktoptheme/) but most themes reside in one of those two directories above.
To create one’s own theme, I recommend finding something close to what you want to create in KDE’s theme library, then access its files in one of the directories above. Virtually all of the theme’s graphics are contained in some sort of .svg file.
The tricky stuff:
The particular element that I wanted to edit is the little bit of branding in the upper right-hand corner of the application launcher menu as depicted below. However this procedure applies to just about all aesthetic edits in the theme. 
Now the particular theme that I happened to be editing was called “Androbit.” But this principle should work for all themes (maybe with some minor variation).
- To edit the icon, I navigated to the file /home/sam/.local/share/Trash/files/Androbit/widgets/branding.svg. The file for this in pretty much all themes seems to be branding.svg or branding.svgz.
- An svg is a vector image. The go-to open source tool to edit one of these is Inkscape. Don’t open it in Gimp or alike because, while gimp can open vector graphics it will save them as bitmaps which is no good for what we’re doing. So, open it in Inkscape.
- Once you’re in inkscape, you’ll need to grab some key info from the existing icon that’s necessary to properly insert your brand object into the theme.
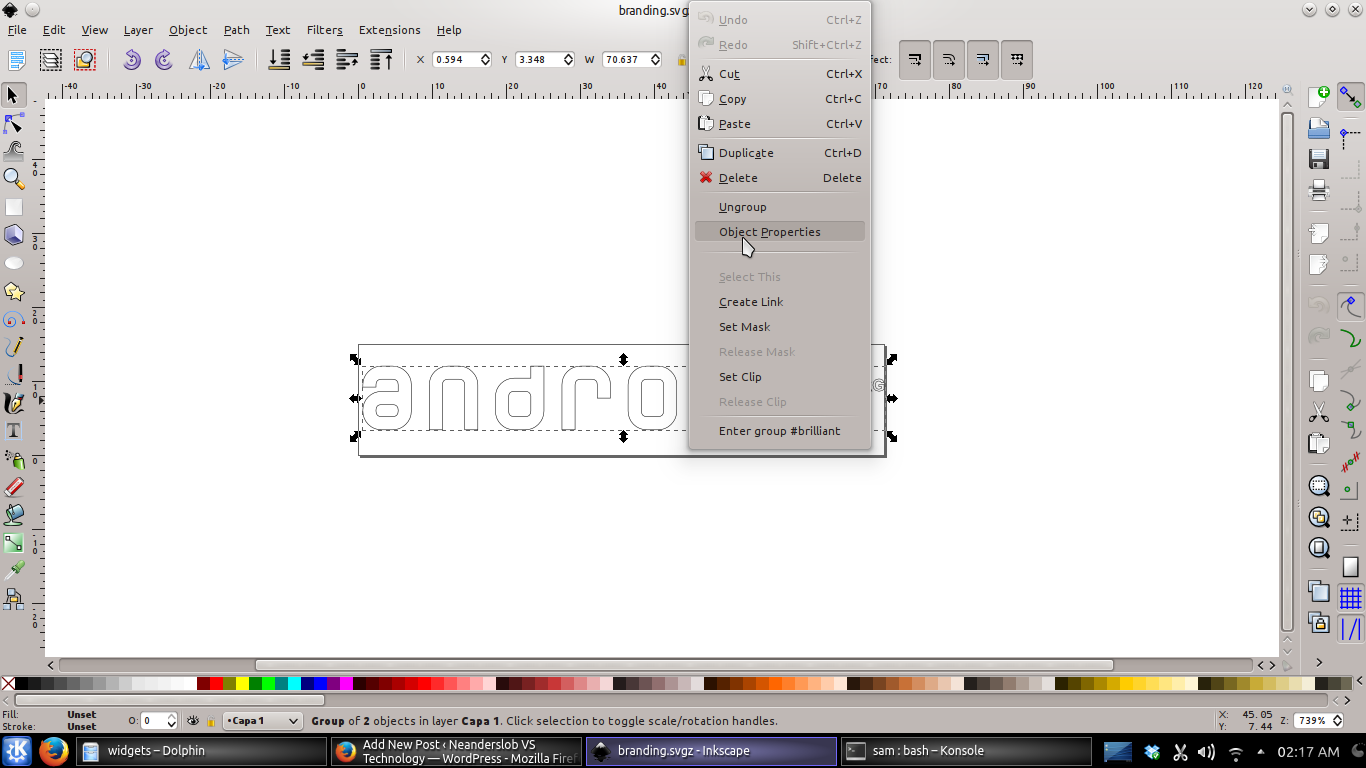
- Select the item and right click on it and select “Object Properties”.

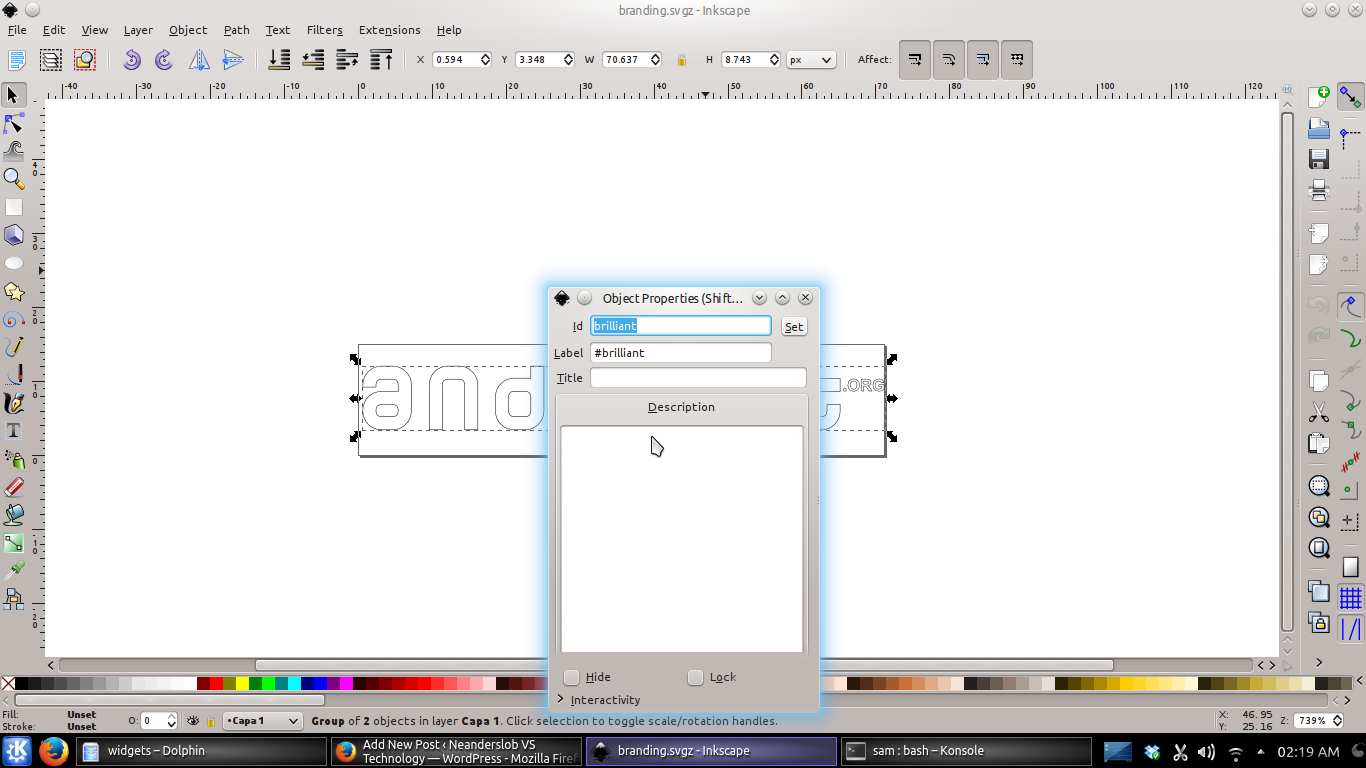
- Within the “Object Properties” window, you will find two text strings: “Id” and “Label”. Write down both strings; you’ll need them in a couple steps.

- Select the item and right click on it and select “Object Properties”.
- Now, go ahead and delete the original bit of branding and put your own in its place.

- Now, to make this text show up, we have to convert it to a path. This step is a bit odd and I can’t tell if it’s a glitch with Inkscape or if it’s meant to be that way but in either case, here we go. Note: if it’s just an image that you put in, you won’t need to do this step.
- Select the text object you just wrote in.

- Next, go up to path and select “Object to Path.”

- There, now the text will show up in the theme (only took me a couple hours to figure that out).
- Select the text object you just wrote in.
- Now, remember that text string from step 2? Good, you’ll need them. Right click on your new object and select “Object Properties.” (Just like before)
- Then write in the two text strings for “Id” and “Label.”

- Now save the file and that’s it. Your new branding should be in your application launcher menu.